
When it comes to online learning tools, it has quickly become a popular choice for teachers and students alike. This tool offers a simple, engaging, and powerful way to manage your educational games, monitor student progress, and keep everything organized in one place. But what exactly is the Bloket Dash? And how can you make the most out of it? Let’s take a look at everything you need to know about the Bloket dashboard, including how it works, its features, and tips on getting started.
What is Bloket Dash?
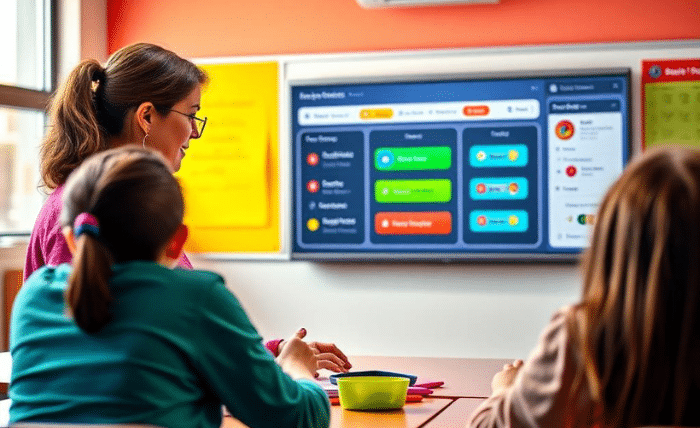
This is the control center for Bloket, a fun and interactive platform that allows students to play educational games. Teachers can create quizzes and games for their students, and the Bloket dashboard is where they can monitor progress, track performance, and customize the learning experience.
Think of the Bloket Dash as the cockpit of an airplane—everything you need to control the journey is right in front of you. Whether you’re managing multiple students or setting up new games, this dashboard gives you all the tools you need to make learning fun and easy.
Key Features of the Bloket Dash
This is packed with features that make managing your educational games and quizzes a breeze. Here are some of the key features you’ll find on your Bloket dashboard:
User-Friendly Interface
One of the best things about this is how easy it is to use. The interface is clean, simple, and designed with both students and teachers in mind. As soon as you log into your account, you’ll be able to see everything at a glance. Whether you’re creating a new quiz or reviewing student scores,it makes it easy to navigate.
Game Creation
The Bloket Dash allows teachers to create their own quizzes and games. You can choose from a wide variety of templates and customize them according to your needs. Want to create a math quiz or a history trivia game? No problem! lets you design your games exactly how you want them.
Tracking Student Progress
One of the most powerful features of the Bloket Dash is the ability to track student progress. As students play the games you’ve set up, the Bloket dashboard will automatically collect data about their performance. You can see how well each student is doing, which areas they need help with, and how long they spent playing each game. This gives you valuable insights into your students’ learning and progress.
Customizing Learning Experience
Teachers can customize the learning experience in many ways using the Bloket Dash. Whether it’s adjusting the difficulty level of a game or setting a timer for each quiz, It allows you to tailor the experience to fit your students’ needs.
Reports and Analytics
It offers detailed reports and analytics to help teachers understand student performance over time. You can see trends in how students are doing on specific subjects or topics. This feature is especially helpful for identifying areas where students may be struggling, so you can provide extra support where it’s needed.
How to Use the Bloket Dash: A Step-by-Step Guide
If you’re new to Bloket Dash, getting started might seem a little intimidating. But don’t worry! We’ve broken it down into easy steps so you can start using the Bloket dashboard like a pro in no time.
Step 1: Create an Account
To begin, visit the Bloket website and create a free account. This will give you access to all the features of the Bloket Dash. Once you’ve signed up, you can log into your account and start exploring the Bloket dashboard.
Step 2: Set Up Your First Game
Once you’re logged in, you’ll be able to create your first quiz or game. From the Bloket dashboard, click on the “Create Game” button. You’ll be given a variety of options for different types of games. You can choose from multiple-choice questions, true/false statements, or even a matching game. Select the type of game you want to create, and then start adding your questions.
Step 3: Customize the Game
After you’ve added your questions, you can customize your game further. You can change the game’s theme, set a time limit, or adjust the difficulty level. It makes it easy to modify the settings to fit your class’s needs.
Step 4: Share the Game with Students
Once your game is ready, it’s time to share it with your students. You can send them a link to the game or have them join directly from the Bloket dashbord. Students will be able to play the game on their devices, and their progress will be automatically tracked.
Step 5: Monitor and Analyze Performance
As students play the game, you can monitor their progress in real-time from the Bloket dashbord. You’ll see how many points each student has earned, how many questions they’ve answered correctly, and which questions they’re struggling with. This data will help you understand how well each student is learning and where they might need extra help.
Step 6: Review and Adjust
Once the game is over, you can review the results on the Bloket Dash. If you notice that many students struggled with a particular question or topic, you can adjust your future lessons to focus on those areas. You can also create new games to reinforce learning in specific subjects.
Why Teachers Love the Bloket Dash
There’s a lot to love about the Bloket dashbord. Here are a few reasons why teachers are choosing this tool for their classrooms:
Engaging for Students
Students love playing games, and Bloket makes learning fun by turning quizzes into interactive games. It creates an engaging environment that motivates students to participate and learn.
Easy to Use
Teachers don’t need to be tech experts to use the Bloket dashboard. The interface is straightforward, making it easy to set up games, monitor progress, and analyze results.
Real-Time Feedback
With the Bloket dashbord, teachers can get real-time feedback on how students are performing. This allows for quick adjustments in teaching strategies if needed.
Customizable to Fit Your Classroom
Every classroom is different, and the Bloket dash allows teachers to customize their games to meet the needs of their students. Whether you’re teaching math, science, or history, you can create games that are relevant to the topics you’re covering.
Troubleshooting the Bloket Dash
While this is a user-friendly platform, you might run into a few common issues when you’re first starting out. Here are some tips for troubleshooting:
Issue 1: Game Not Loading
If a game isn’t loading properly, try refreshing your browser or checking your internet connection. If the issue persists, check for any updates to the Bloket dashboard.
Issue 2: Students Can’t Join the Game
Make sure the students have the correct link or game code. If they’re still having trouble, double-check that the game is set to “public” or that the student is logged in properly.
Issue 3: Performance Data Missing
If you’re not seeing performance data for a game, ensure that students have fully completed the game. Sometimes, data might not be saved if a game is interrupted.
Conclusion: Making the Most of the Bloket Dash
This is a powerful and easy-to-use tool that helps teachers manage their educational games, track student progress, and customize the learning experience. By understanding its features and learning how to navigate the Bloket dashboard, you can create a fun and effective learning environment for your students. Whether you’re new to the platform or an experienced user, it has something for everyone.
So, what are you waiting for? Start exploring the Bloket Dash today and take your classroom to the next level!